


Smooth Transition: Basic Guide to End of Tenancy House Cleaning
Posted on 20/09/2025
Smooth Transition: Basic Guide to End of Tenancy House Cleaning
End of tenancy cleaning is a crucial step for both tenants and landlords. Whether you are moving out or preparing a property for new tenants, ensuring a spotless and hygienic environment is essential for a flawless handover. A comprehensive house cleaning at the end of your lease helps you secure your deposit, maintain a good reputation, and paves the way for a smooth transition. In this detailed guide, you'll discover everything you need about end of tenancy cleaning, including useful checklists, methods, common pitfalls, and insider tips.
Why Is End of Tenancy House Cleaning Important?
A thorough clean at the end of your rental agreement is often a mandatory requirement, outlined in most tenancy contracts. Beyond your legal obligations, there are several reasons why this process is vital:
- Deposit Retrieval: A clean property guards your deposit against unnecessary deductions.
- Positive References: Leave a great impression on landlords and increase your chances of positive referrals.
- Smooth Move-In for Next Tenants: By fully cleaning, you ensure new tenants enjoy a fresh start.
- Avoid Disputes: Prevents disagreements or legal issues related to the property's condition.
Most tenancy agreements emphasize that a rented property must be returned in the same state it was initially provided (except for 'wear and tear'). Hence, a meticulous end of tenancy clean is key to a hassle-free exit.
Preparing for Your End of Tenancy Clean
Should You Clean Yourself or Hire Professionals?
Before diving in, decide if you'll tackle the cleaning yourself or call in a professional end of tenancy cleaning service. Each option has its own pros and cons:
-
DIY End of Tenancy Cleaning:
- Pros: Cost-effective, flexible with schedule.
- Cons: Time-consuming, physically demanding, risk of missing hidden spots.
-
Hiring Professionals:
- Pros: Guaranteed results, deep cleaning including hard-to-reach places, saves time.
- Cons: Can be expensive, scheduling needed.
No matter your choice, the following checklist will help ensure a comprehensive end of lease clean and boost your chances of a full deposit return.
Essential End of Tenancy Cleaning Checklist
Every landlord and letting agent has slightly different standards, but most expect an exceptionally clean property. Here's a room-by-room guide:
Throughout the House
- Dust and wipe all surfaces, including shelves, skirting boards, and window ledges
- Remove cobwebs from ceilings and corners
- Clean all internal doors and handles
- Wipe down light switches, sockets, and radiators
- Remove marks from walls (if possible)
- Vacuum carpets, mop hard floors
- Clean mirrors and glass surfaces
- Empty bins and disinfect waste areas
Kitchen Cleaning
- Clean all kitchen cupboards inside and out
- Degrease and scrub the oven, hob, and extractor fan
- Clean and wipe inside the refrigerator and freezer (defrost first), leave doors open to prevent mold if unplugged
- Disinfect all countertops, kitchen sinks, and taps
- Check and clean under appliances (microwave, dishwasher, washing machine)
- Empty crumb trays and clean small kitchen appliances
Bathroom and Toilet
- Scrub the bathtub, shower, toilet, and sink
- Remove limescale, water stains, and soap scum from faucets and tiles
- Polish mirrors and glass shower doors
- Clean towel rails, shelves, and extractor fans
- Empty bathroom bins and disinfect
Bedrooms and Living Areas
- Dust and wipe all furniture and surfaces
- Vacuum carpets and upholstery thoroughly
- Clean wardrobes and drawers inside and out
- Wipe light fixtures and lampshades
- Remove any personal belongings and rubbish
Windows and Doors
- Clean glass inside and out where accessible
- Polish window handles and frames
- Wipe down door surfaces and frames
Tip: Always check your tenancy contract for any specific cleaning requirements.
Supplies You Need for End of Tenancy Cleaning
To achieve *professional-standard results*, you'll need the right tools and products:
- Multi-purpose cleaners (for surfaces and appliances)
- Disinfectant sprays and wipes
- Degreaser (for kitchen appliances)
- Limescale remover (for bathroom fixtures)
- Glass and mirror cleaner
- Microfiber cloths, sponges, and scrubbers
- Vacuum cleaner and mop
- Rubber gloves and garbage bags
- Bristle and toothbrushes (for tight spaces and grout)
Using the right supplies ensures that even the most stubborn stains, grease, and debris are taken care of during your end of tenancy house cleaning.
Room-by-Room Cleaning Techniques for Best Results
Kitchen Deep Cleaning
The kitchen often requires the most effort due to food residues and grease buildup. Here's how to tackle this vital area for your move out cleaning:
- Oven: Apply an oven cleaner and let it sit before scrubbing. Pay special attention to the racks and trays.
- Fridge/Freezer: Unplug, defrost, and clean all shelves and trays. Wipe all seals to prevent mould growth.
- Cupboards: Remove all items, vacuum crumbs, and wipe both inside and out.
- Sink/Taps: Use limescale remover, and polish for a sparkling finish.
- Floors: Sweep then mop, ensuring no sticky residues remain.
Bathroom and Toilet
Bathrooms need to be spotless for hygiene reasons:
- Tiles/Faucets: Remove all stains, mold, and limescale.
- Toilet: Disinfect everywhere, including behind the seat and base.
- Glass: Use a dedicated cleaner for a streak-free shine on mirrors and shower screens.
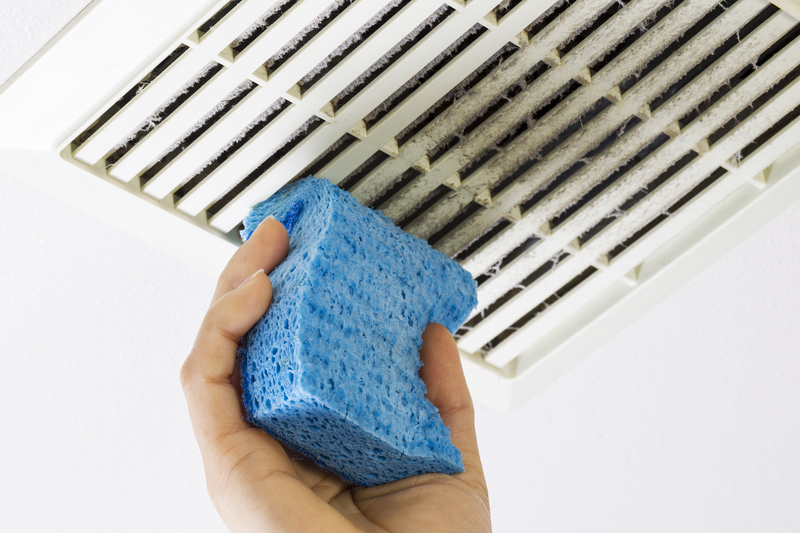
- Ventilation: Check extractor fans for dust buildup and clean them.
Bedrooms, Living Room, and Hallways
- Carpets/Upholstery: Move furniture and vacuum thoroughly. If stained, use a carpet cleaner or spot remover.
- Walls: Address scuff marks or stains with a mild cleaning solution.
- Furniture: Clean under and behind all pieces, not just visible areas.
Extra Attention Areas
- Light fixtures: Remove dust and dead insects.
- Remote controls, handles, and switches: Disinfect, as these are major touch points.
- Behind appliances and radiators: Don't miss these hidden dust traps.
Thorough attention to detail ensures your end of tenancy house clean is truly complete.
Common End of Tenancy Cleaning Mistakes to Avoid
Make sure your efforts aren't wasted by sidestepping these frequent blunders:
- Leaving it too late: Rushed cleaning means missing critical areas. Spread your cleaning over a couple of days for best results.
- Missing hidden spots: Landlords and agents check under furniture, behind appliances, and inside cupboards; don't skip these!
- Forgetting appliances: Ovens, fridge/freezers, and microwaves must be spotless and odor-free.
- Ignoring limescale and mold: These leave a bad impression; use specialty removers as needed.
- Overlooking minor repairs: Fix small holes, replace lightbulbs, and make basic repairs where possible.
Should You Use Professional End of Tenancy Cleaners?
Many tenants opt for professional cleaning services to ensure a *guaranteed pass* on their inventory check. Consider professional help if:
- You have limited time before moving out
- The property is very large or heavily soiled
- Your deposit is substantial and you can't risk deductions
- The landlord or letting agent requests a professional invoice
Professional cleaners are well-versed in move out cleaning checklists and typically offer a "reclean guarantee," revisiting your property free of charge if the cleaning does not meet the landlord's standards.
Frequently Asked Questions About End of Tenancy Cleaning
- How long does end of tenancy cleaning take?
Depending on the property size, a thorough clean may take between 4 to 10 hours. - Do I need to clean carpets professionally?
Only if it's stated in your contract, or the carpets are heavily stained. - What happens if end of tenancy cleaning is not done properly?
Expect deductions from your deposit, or your landlord may commission a cleaning service at your expense. - Can landlords charge for end of tenancy cleaning?
They can only deduct reasonable costs from your deposit if the property isn't left clean.
Tips for a Stress-Free End of Tenancy Cleaning
- Start early: Begin cleaning after the majority of your belongings have been moved.
- Have a cleaning schedule: Break tasks into manageable sections over several days.
- Enlist help: Family or friends can make the process much quicker and more efficient.
- Photograph your work: Record evidence of cleanliness for your records.
- Check the inventory: Match your cleaning to the original move-in inventory document.
Conclusion: Secure Your Deposit with a Meticulous End of Tenancy Clean
Wrapping up your tenancy with a professional-standard house clean can seem overwhelming, but with preparation and attention to detail, you'll breeze through the handover. Whether you choose the DIY route with the ultimate checklist or invest in professional end of tenancy cleaning services, the key is thoroughness. Don't leave anything to chance--polish, scrub, and clean every inch to guarantee a *smooth, stress-free transition* and secure your deposit back in full.
Remember, a sparkling home benefits everyone: you, your landlord, and the property's next residents. Happy cleaning and good luck on your next adventure!
Latest Posts
Mastering the Clean: Effortless Steps to Gleaming Enamel Oven Trays
Achieve Immaculate Curtains with Simple Cleaning Hacks
Smooth Transition: Basic Guide to End of Tenancy House Cleaning
